


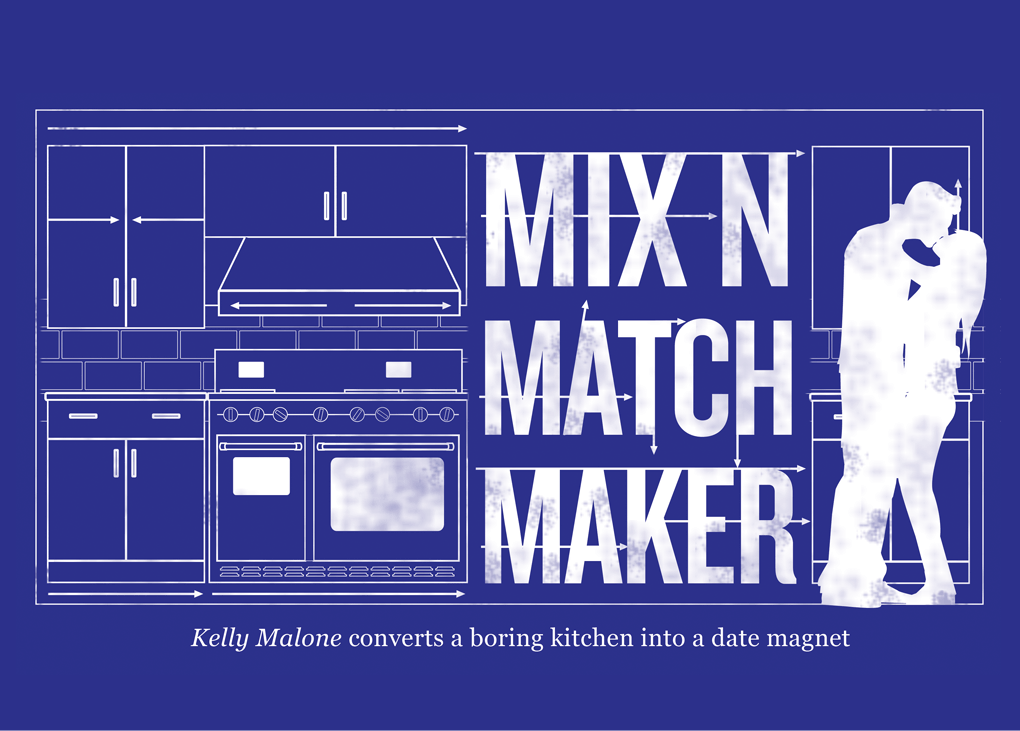

By Kelly Malone
How many times have you gone home with a date only to find your Prince Charming’s place looks like a scene out of Animal House? Or realized the girl you’re seeing collects more stuffed animals than a Fluff ’n’ Stuff mall kiosk? Perhaps you thought you’d finally found someone special, only to discover you’re gonna be romanced on a broken futon with a Star Wars sleeping bag for cover. It doesn’t take much to make your apartment a respectable bachelor or bachelorette pad. In fact, it requires just one weekend and a crisp Ben Franklin.
My plan: Take an awesome guy with a not so awesome apartment and show him how to design it on a budget, using DIY resources. I wanted to cross his place over from vanilla to sexual chocolate.
My victim: DK, one of my favorite friends. He’s stylish, has good taste, and is generally creative, but he has a total dude pad. You could sum up his décor thusly: a couple Giants cups, two pots and pans, and a lot of white walls.
My background: DIY addict. I currently run Workshop, and spent many years arranging Gap and Urban Outfitter stores to look purdy (aka visual merchandising). I also have an ongoing obsession with interiors. If I walk into a room, it’s best you don’t talk to me for about five minutes until I’ve stopped redesigning the space in my head.
I want to give DK a place worthy of bringing dates home to. Since I’m a little overwhelmed by his blank canvas and only have a weekend, I decide to start with the most date-worthy room. Bedroom? Nah, too forward. Living room? Screams make out; not subtle enough. Kitchen? The winner. It’s great for late-night, post-dinner conversation. He can impress her with his cocktailing skills at the new bar we’ll create, and then they can talk art — since we’ll be adding lots to the walls. Perfect plan.


I am staring at DK’s kitchen and wondering how the heck do I fill all this? I ask him to hit the web, scanning blogs like Design Sponge, Apartment Therapy, and designformenmag.com to give me a general sense of what he likes. Then homework: I ask him to pull out his five favorite personal items that I can tease out some design themes from.
He follows my instructions, handing over a flannel western shirt, his rock poster collection, vintage belt buckles, a book of vintage black-and-white country western photos, and his stack of notebooks (DK is a bit of a note taker). It’s now time to translate them into décor ideas.
We decide on a sleek black-and-white kitchen with a vintage western theme, a man bar (à la Don Draper circa 1967) for entertaining, and chalkboard paint for proper note taking. Now comes the tough part: to do this on our budget.


Paint can add up in price. After doing a little research, I find that the most affordable option around is the free paint bin at the dump, aka Recology.
Recology is located by Candlestick Park, and I head down there, driving past all the cool art perched on the hillside and taking a left toward the unmarked train car. Doesn’t look like much, but upon walking in, I am greeted by about a hundred cans of paint.
There’s no line for mixing here, no comparing samples, just a ton of cans with swabs on top. I dig through the Martha Stewart, Ralph Lauren, and Behr gallons aplenty and end up finding shades of light gray, dark gray, and white. I take home five gallons for the low, low price of $0. Plus, the shopping takes a whole of five minutes, in and out.
I love the colors I found. They’re perfect for the kitchen trim and I can use some later for the bedroom walls when we move on to the rest of the house. Now I just need to find chalkboard paint. I head over to Cole Hardware and shell out $40 for a gallon plus tape and a roller. Score! As an added bonus, I can use the chalkboard paint to darken and alter the other colors I grabbed at the dump.


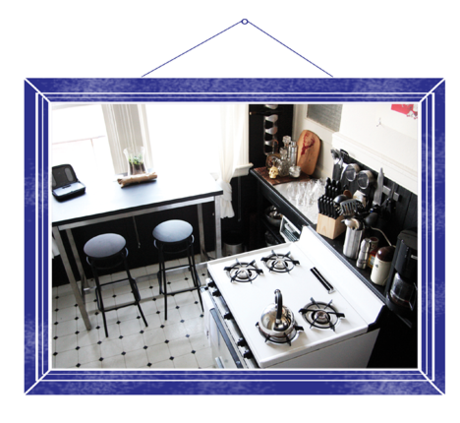
I’ve picked out the colors, and it’s time to paint. After all, the biggest issue with this kitchen was the empty, white walls. A few episodes of The Dukes of Hazzard on cable and a six-pack gets us in the country western spirit. We paint all the walls, trim, and cabinets, and soon we’re on to the furniture and design.
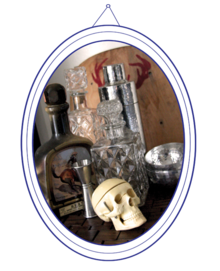
DK has a standard, sturdy wooden counter on wheels. We slap some chalkboard paint on it, along with snazzy silver knobs and wheels. Voilà! He has a sleek bar. (If only I could stock it with some of that Duke brothers moonshine.) I now need to dig up seating and supplies (including glasses that aren’t beer company swag), decorating knickknacks, and a shelf for storage.


I head off to Building REsources in Bayview with some sketches and measurements in hand. The surrounding industrial scene is a sharp contrast to the fun, plant-infused wonderland inside its yard. I ask a nice staffer (who, by the way, is pretty dreamy) to help me pick out the best wood for what I’m making. Always take advantage of free expert advice — you don’t have to be an expert carpenter to nail together simple pieces with a little guidance.

I delve through the salvaged stacks of doors, windows, tiles, metal scraps, and recycled goods, taking a minute to ogle the massive planters the staff have built with spare parts. I’m pretty inspired here. Building REsources is part Sanford and Son, part rogue gallery, and part lumberyard. I end up finding some great wood pieces with the appropriate amount of distressing and weathering to make them look expensive.
I then head inside, where the nicest older gentleman is telling me jokes and complimenting both my carpentry sketches and my dress. Here I find all kinds of fabulous knobs, hardware, and lights that will soup up the kitchen. Did I mention the friendly guys at Building REsources are busy cutting my wood to size while I’m shopping in here? Oh yes, I don’t need my saws for this gig.
I walk out spending a mere $38, and have a car filled with lumber, knickknacks, and old drawers (which I’ll paint and make into shadowboxes and shelving). Major score. If only I’d gotten the phone number of the cute guy who helped me. Can’t have everything, I guess.


My last step is to hit the Salvation Army on Valencia and 26th. It’s the best Salvation Army for miles. I saddle up a cart and hunt for bric-a-brac (stuff that isn’t wearable or furniture). Luckily for me, bric-a-brac happens to be 50 percent off today. (Check the signs in the windows for rotating daily deals.) I score some awesome storage jars for the kitchen, a jar for a terrarium, silverware, a dish drainer, a stainless steel trash can, and men’s flannels to remake into seat cushions for DK’s bar stools. Last but not least, I grab some sweet cocktail glasses and barware. Total cost: $52. Epic.
I head back to DK’s and take stock of my finds. At Building REsources, I’d grabbed a piece of sheet metal. I’m no metal worker, but this piece looked rad and was pretty big. I figured it would make a cool counter top. I nail this puppy down to our table on wheels with some small roofing nails — they’re perfect for metal and have wide tops that look decorative. Our bar is officially sleek and awesome, and I am about ready for a cocktail at this point.


I grab our bric-a-brac and next accessorize the kitchen. This bachelor pad is no longer a ghost town of chopsticks and ketchup as I stock it with silverware, serve ware, and bar supplies.
For shelves, I hammer together our precut board and throw on some wheels I found at Building REsources for $1. Our storage area is complete in a flash, and the wood nicely balances all the black and white in the room.
We draw and stencil on the extra wood for insta-artwork. My favorite: a buck image we use to adorn a broken-off chair seat I’d found on the sidewalk. We also create décor from the country western book DK loves so much (don’t fret, we found another copy at Aardvark Books for a few bucks). Using an X-Acto knife and a ruler, we slice out the best pages and tape them into well laid-out clusters along the walls. The kitchen has now been transformed into an art gallery, circa Nashville 1968. New paint? Check. Storage? Check. Awesome man bar? Check. New artwork? Check. All for under $100 and in one weekend? Check.
DK’s reward: A kick-ass kitchen where he can comfortably entertain, conquering his fear of design in the process. The room also represents his personality and Southern upbringing.
My reward: Throwing back some mean gimlets at DK’s place. Score!

Recology paint bin is open Thursday, Friday, and Saturday, 8 a.m.–4 p.m. There are several colors of recycled paint available, and more info can be found here:
http://recologysf.com/hazardousWastePaintRecycling.htm.
Salvation Army is located at Valencia and 26th, open every day except Sunday, 9:30 a.m.–8 p.m.
At Building REsources, you can also donate supplies as well as buy them. It’s located off 3rd and Cargo Way at 701 Amador Street, open 9 a.m.–4:30 p.m. daily. The staff occasionally offer workshops there too.
Design Kate VandenBerghe
The Bold Italic is a not-for-profit media organization, and we publish first-person perspectives about San Francisco and the Bay Area. We operate under a fiscal sponsorship of a 501(c)(3).
You can become a paid subscriber. Or donate. Or learn more about us.